

- Login – To start the reviewing process, first visit UNT's PolicyTech website and log in using your EUID and password.
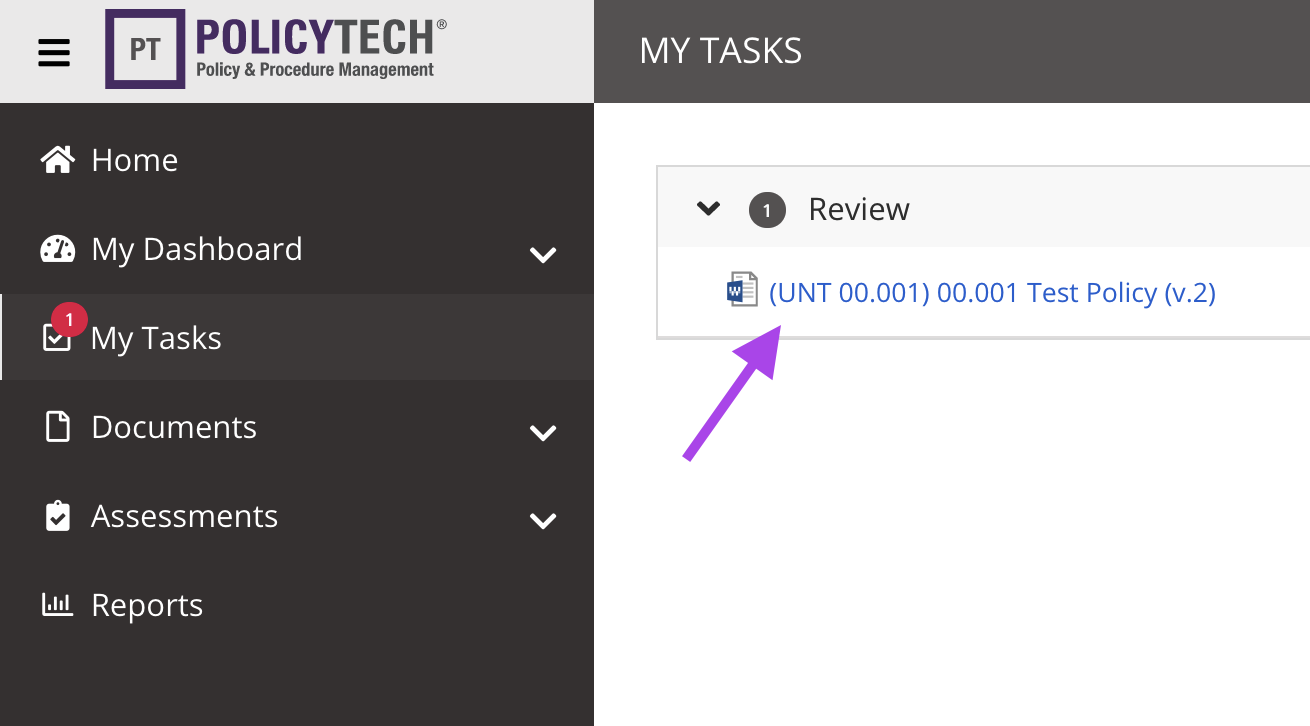
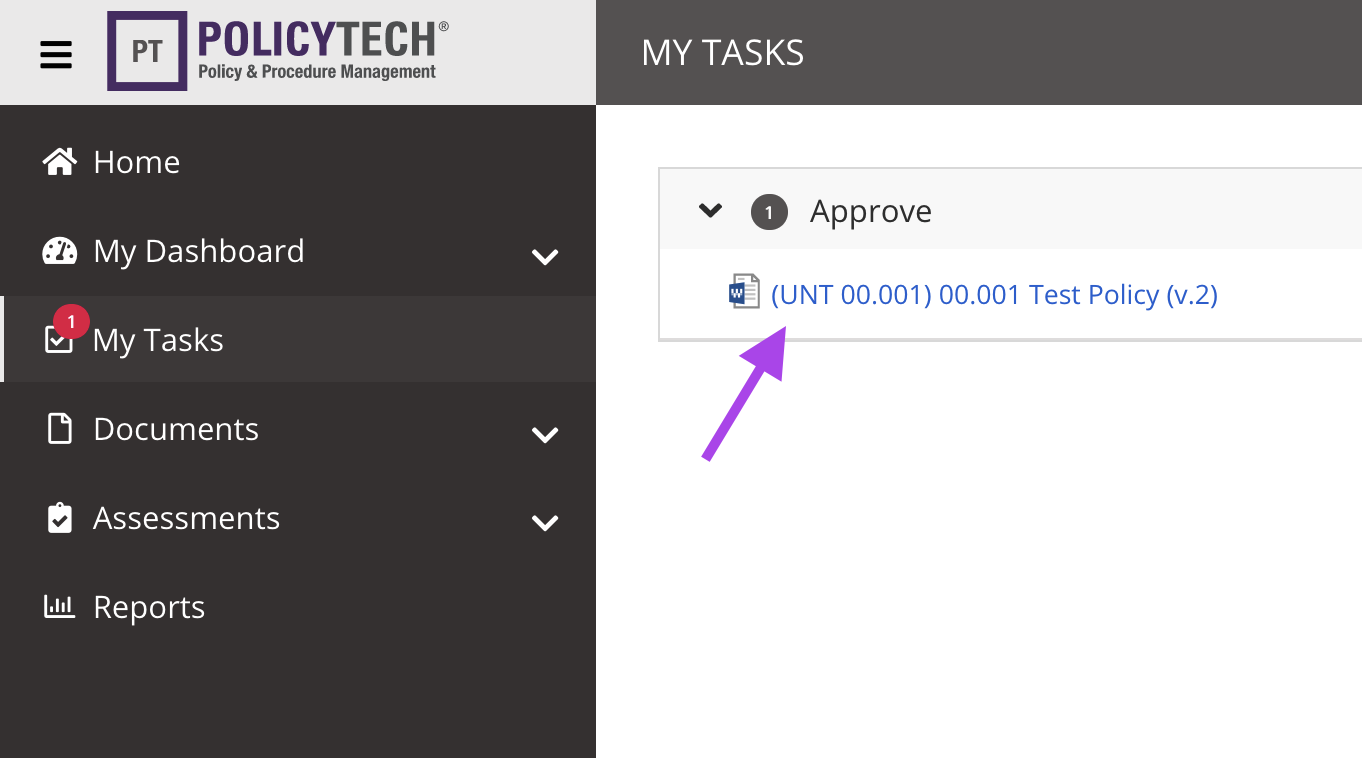
Policy Selection – Select "My Tasks" in the left side navigation bar, then look under the "Review" or "Approve" headings in the central window to find the policy you wish to open. Once you have located your policy document, select the title of it to open it.
- Accept or Revise – A preview of the policy document will then display in your web browser. From here, you may scroll through and review the policy. You then have two options. You may: (A) select the "Accept" button at the top to approve it, and the policy will close; or (B) select the "Revise" button, which will allow you to edit the policy. If you wish to "Revise" the policy, it will automatically decline (e.g., reject) the policy. This is unavoidable. If you wish to make a minor, nonsubstantive change to the document, you can avoid declining the policy by emailing the policy office (policy@unt.edu) the details of your desired edit and we'll be happy to make it for you. Alternatively, you may select "Revise," make your change, and then when prompted to enter comments before closing the policy, you may specify in your comments that you approve the policy with your edits. The Policy Director will then disregard the decline notice, accept your changes, and move the policy forward.0

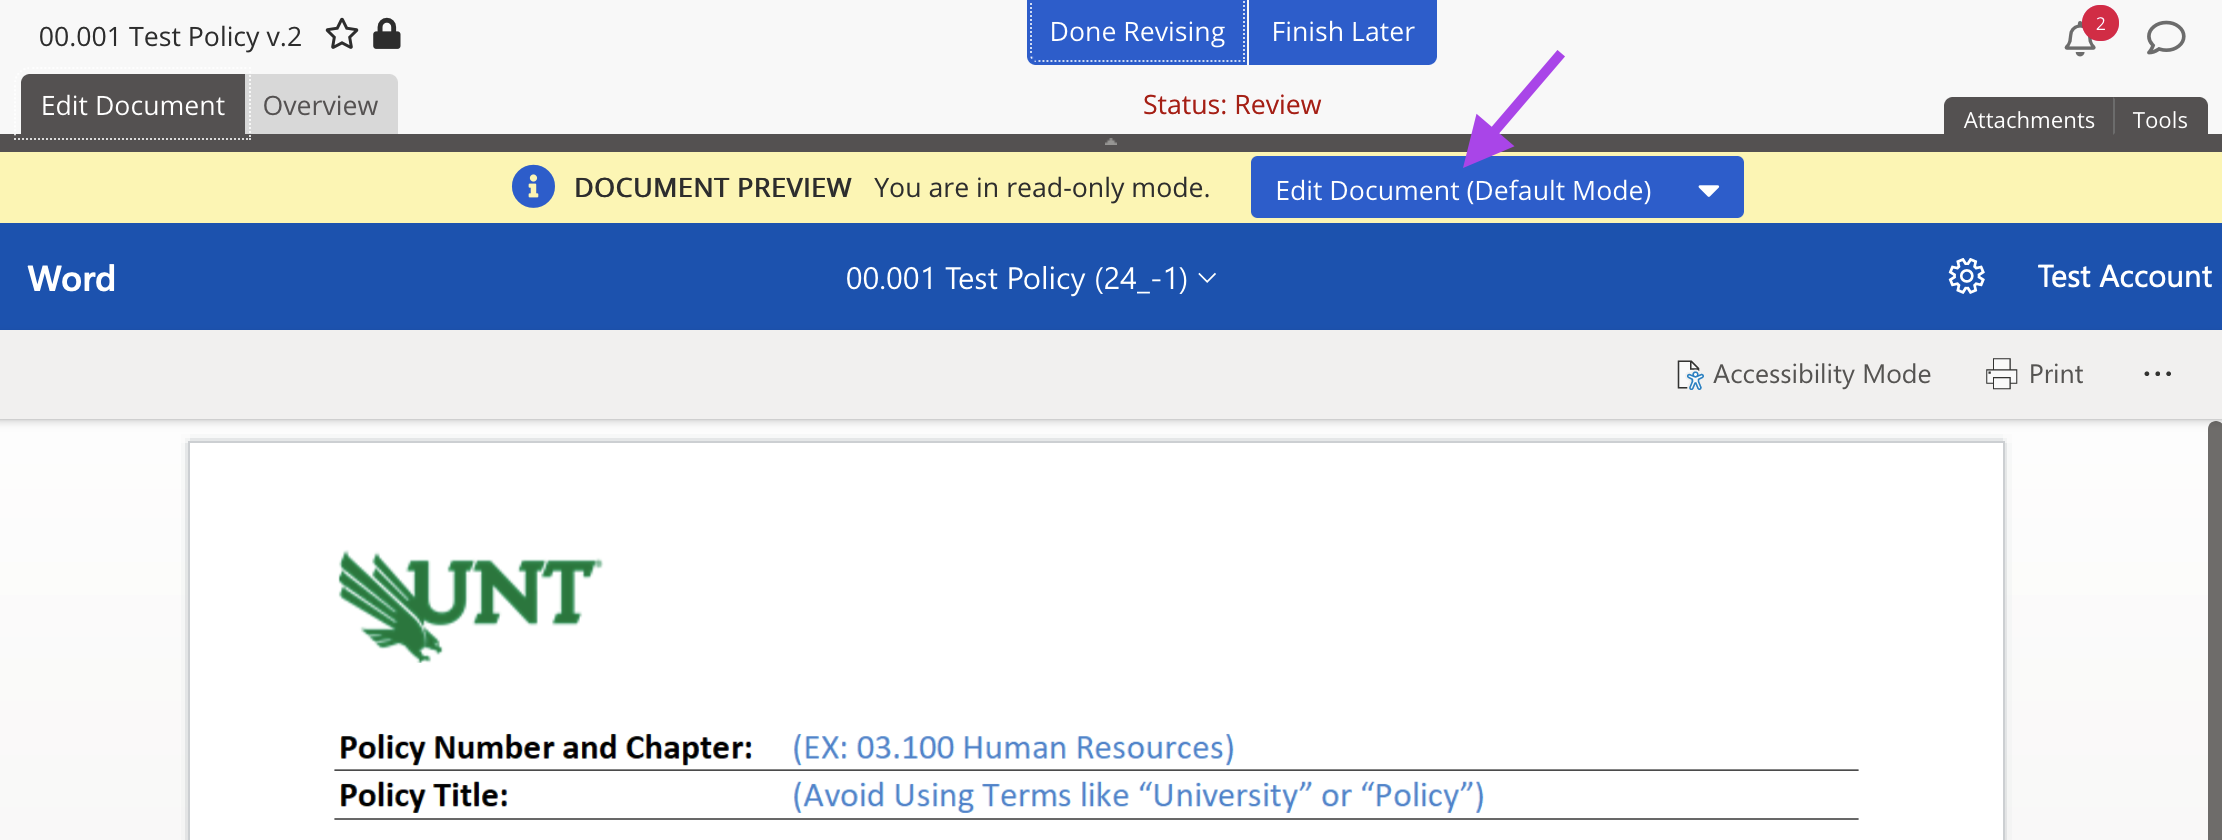
Edit – If you select to "Revise" the policy, your browser window will refresh and you will see a new button appear labelled "Edit Document (Default Mode)." Selecting this button will usually default to opening the policy document in Microsoft Word's desktop version in a separate Microsoft Word window. You may then edit the document as necessary, using Track Changes, and inserting Comments where appropriate to explain your changes or pose questions or concerns.
Please Note: The first time you open a document in PolicyTech you will need to set default options. When prompted, check the "Set as Default" checkbox next to "Open in Microsoft 365 desktop app (2016 or later)." Then, select the "Go" button to the right.
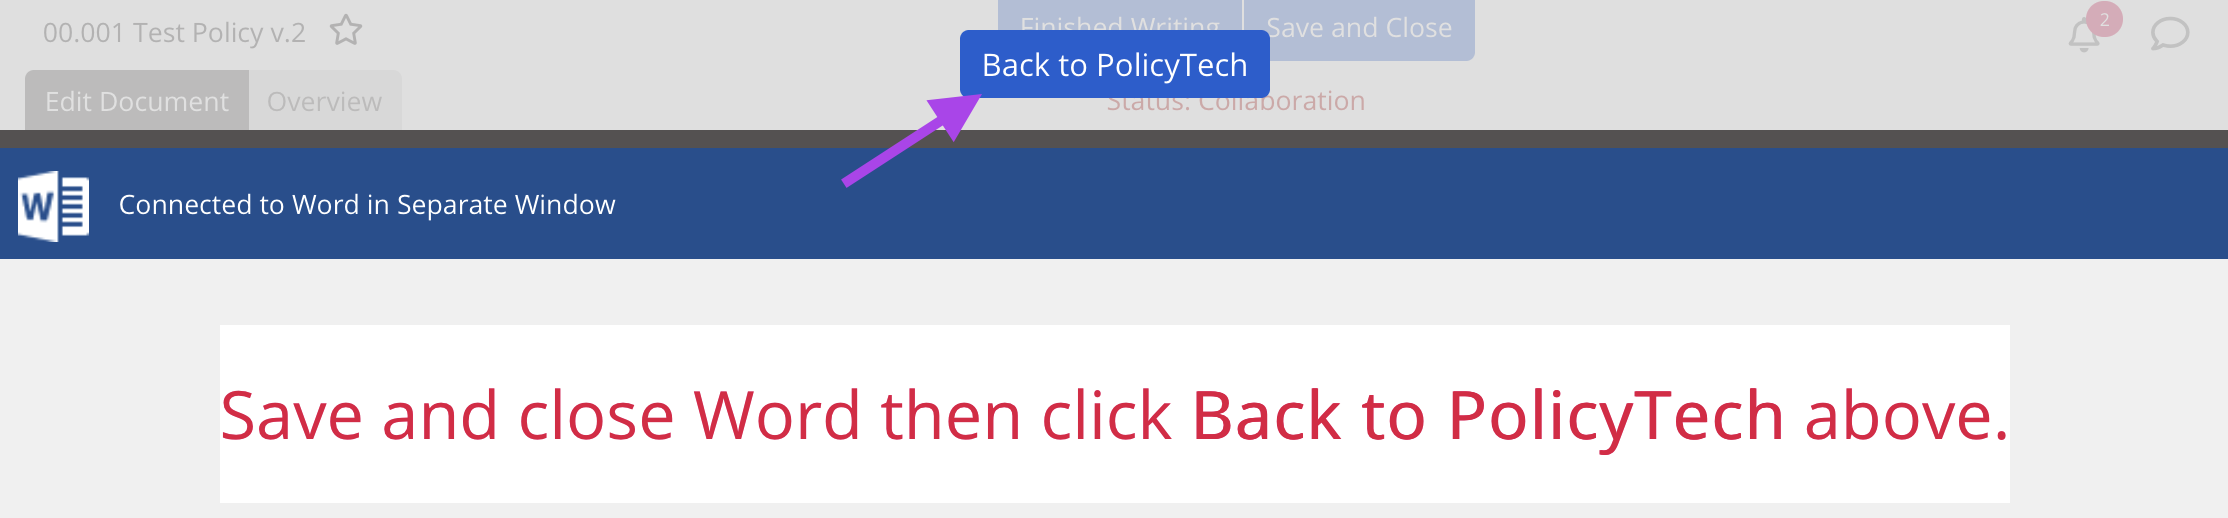
- Save – After editing the document, save it in Word by selecting the disk-shaped save icon or by selecting "File" from the menu bar, and then "Save" (NOT "Save As"). Close the Microsoft Word window and return to your web browser. You should see a message like the following which reads: "Save and close Word then click Back to PolicyTech above." Select the "Back to PolicyTech" button to return to the policy preview page.
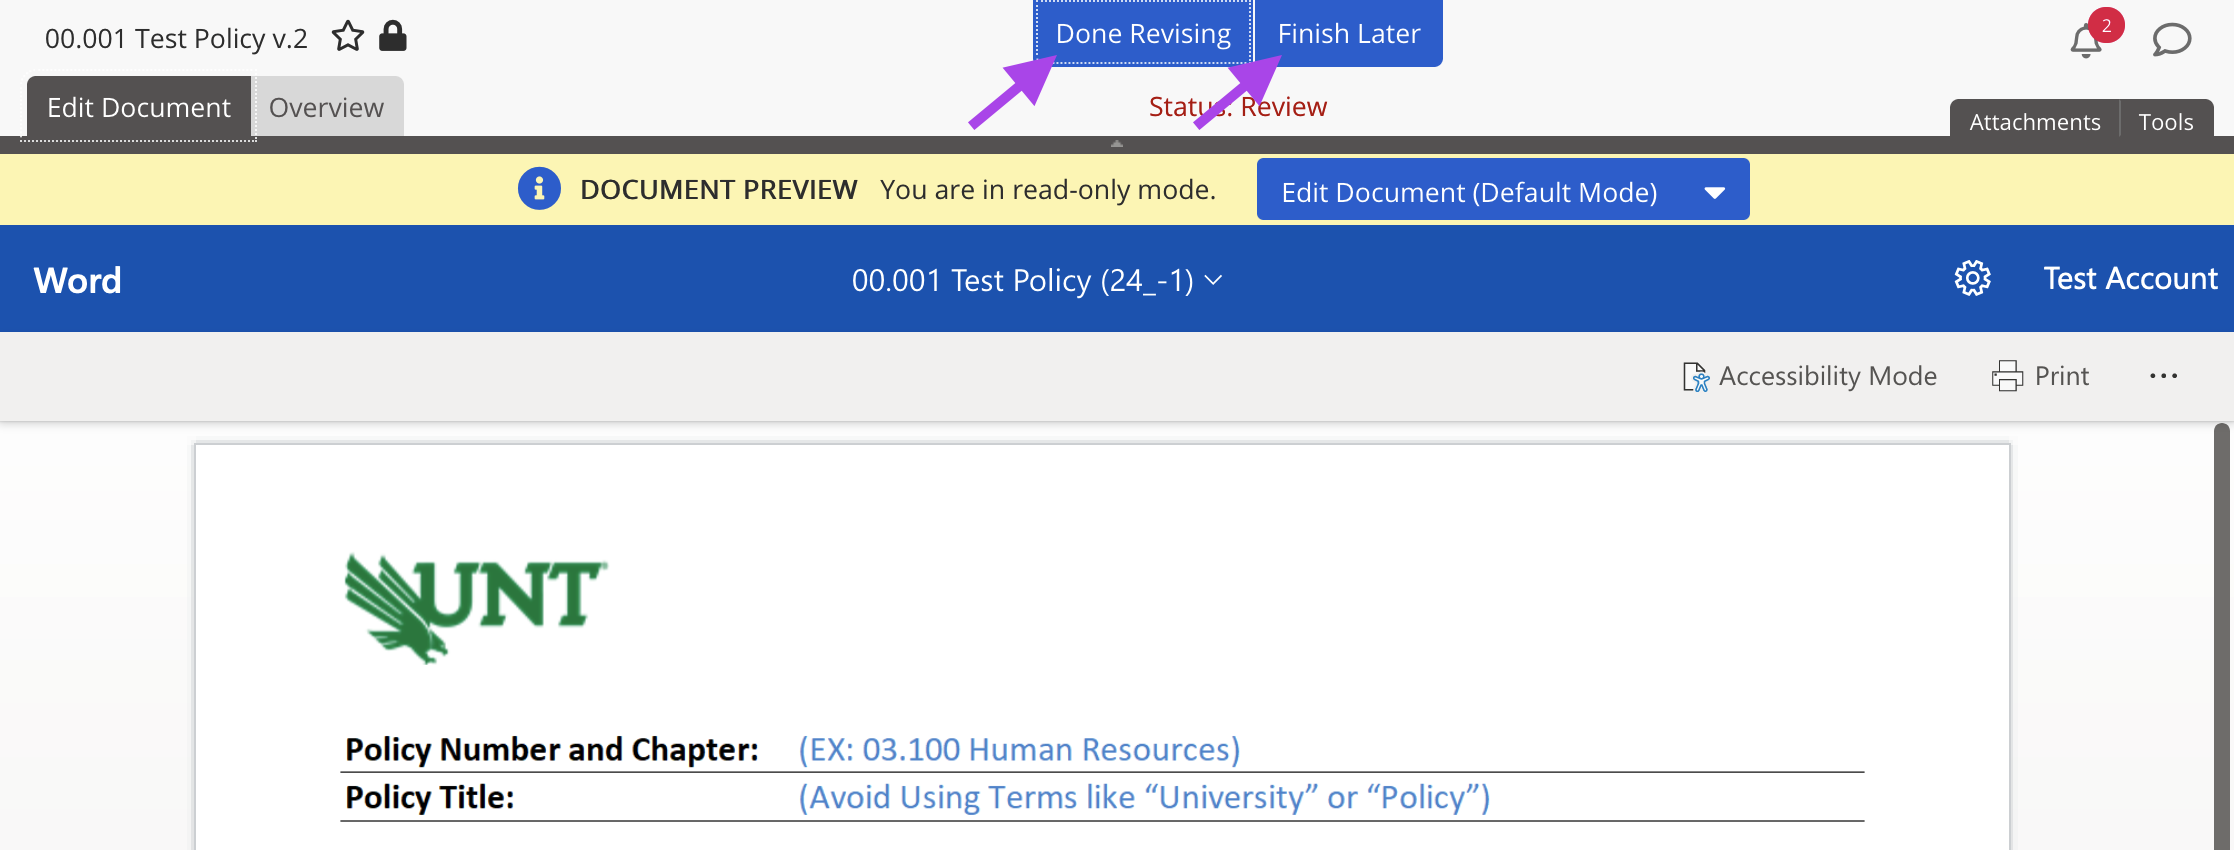
- Close – Once more, you have two options: (A) if you have finished all your editing of the document, you may select the "Done Revising" button at the top of your window; or (B) if you wish to save the policy, but also resume your editing of it at a later time, then select the "Finish Later" button instead. If you opt to "Finish Later," you will be returned to your "My Tasks" list and the following steps will not be needed.
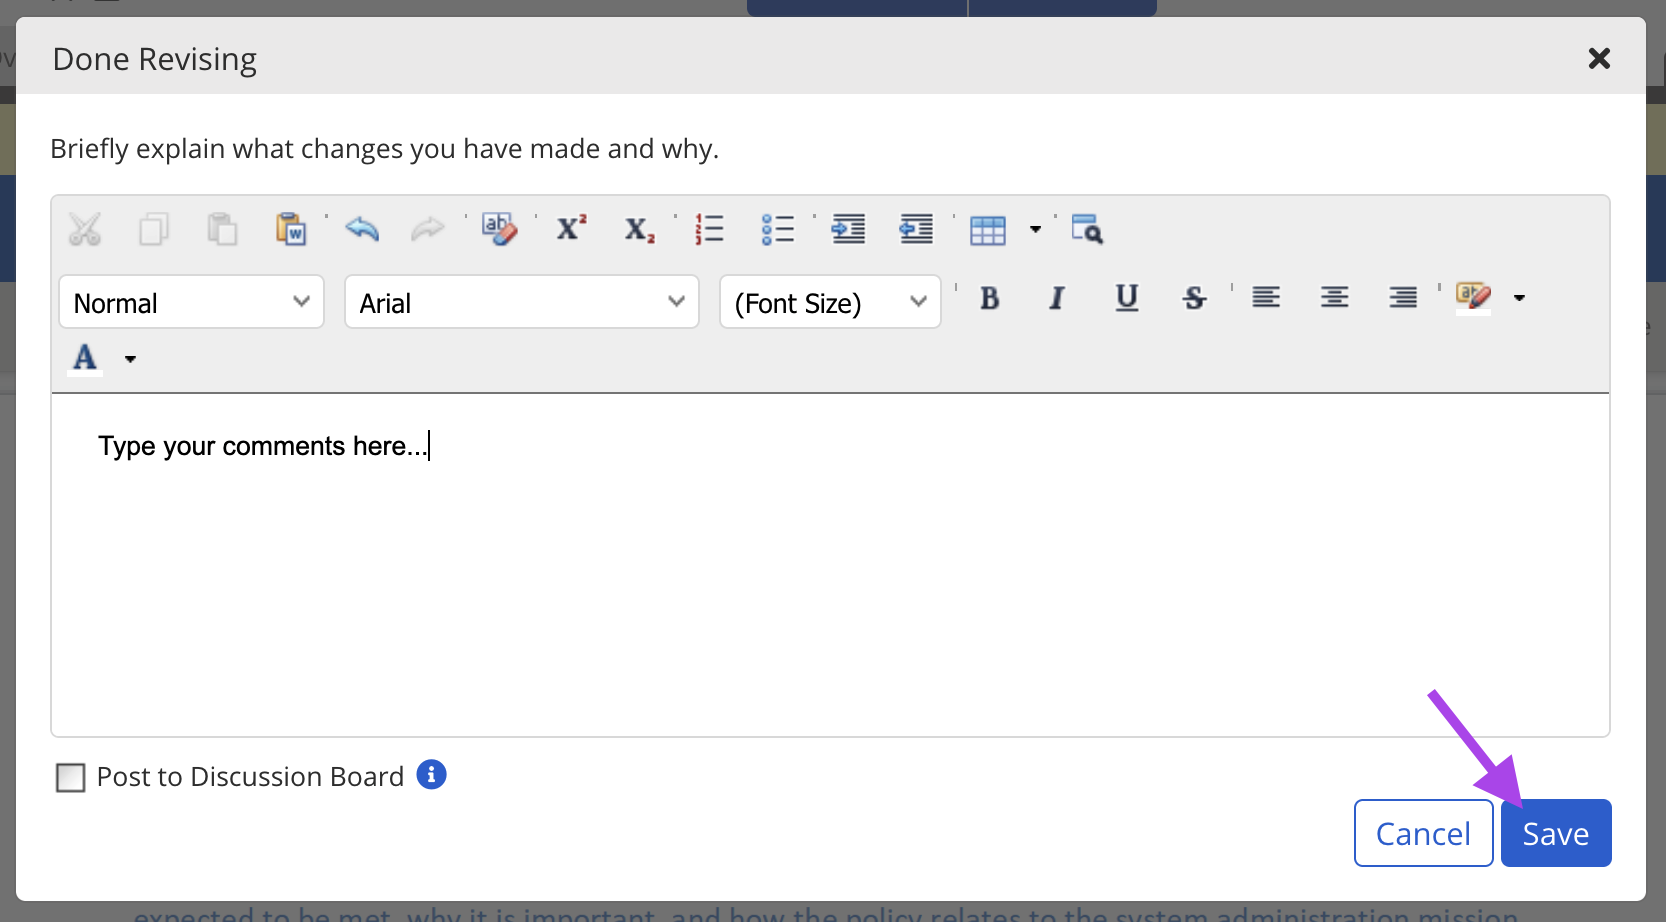
- Comment – If you are "Done Revising," and select that button, you will then be prompted to add comments. Add a description of what changes you have made and whether or not you reject the policy with the changes in the small window which appears, then select "Save."
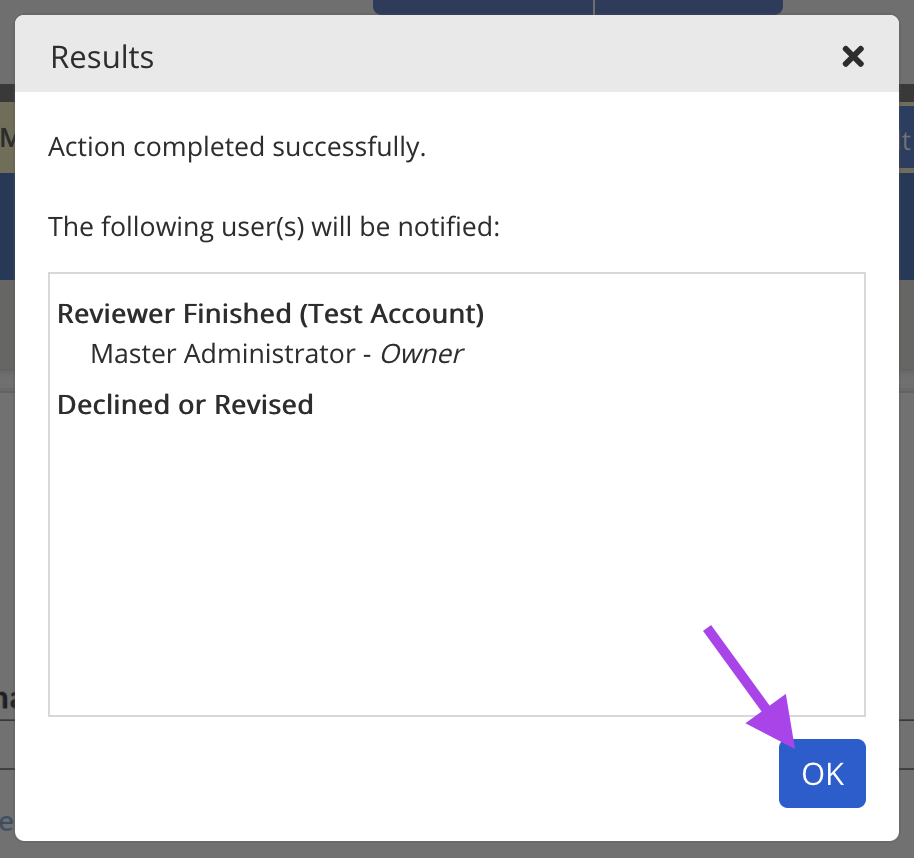
- Confirm – One last small window will appear, confirming who will or will not be notified. Select the "OK" button at the bottom right corner of the window, and the policy should close. If not, close it to return to your PolicyTech "My Tasks" list.
- Congratulations! You have successfully reviewed a policy!